So far, we've been building smaller components in isolation. We've not thought about building a full app centered around using Modulo.
What about building a multi-page website in Modulo? What about maintaining an SEO-friendly blog or content heavy site? How about integrating a Content Management System, so non-technical users can contribute content and manage media files? What about as projects grow and gain more and more dependencies, how do we keep them all straight?
📦 📦 📦
So far, we've used Modulo in a small way. Now, get ready to…
🏗️ Go Big! 🏗️
In this section, we'll introduce the SSG / Jamstack template, which is a template all set-up and ready to go to launch on servers like Netlify.
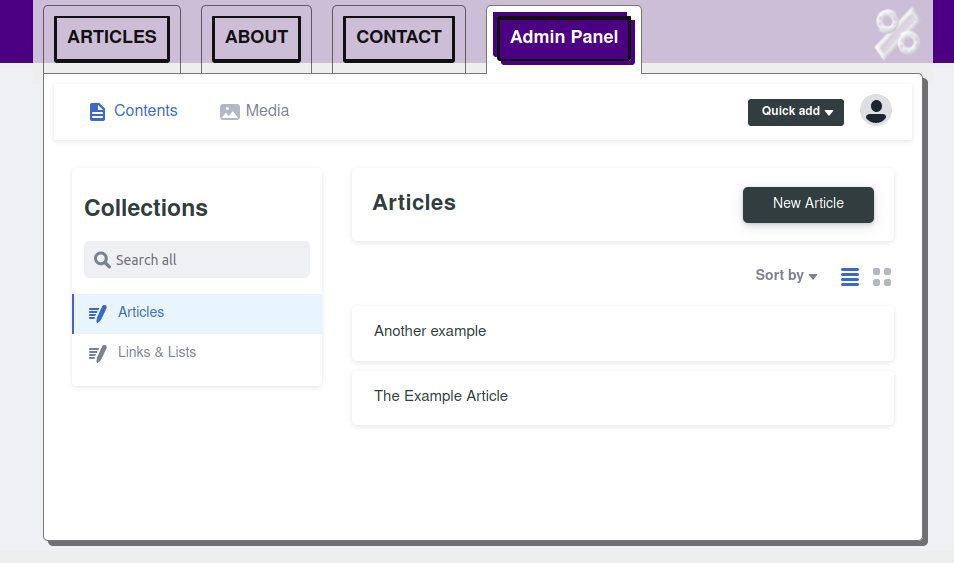
DecapCMS is a simple but powerful content management system that can be run locally for a GUI Markdown editor of files in your project, or run remotely using a third party login auth system (e.g. GitHub's authentication system API) to have multiple users contirbute to the same site. This allows non technical users to edit the same files as developers, keeping everything in one spot (a git repo).
Terminology
Background: In order to understand this next section, some terminology background might be useful.
SSG is static site generator. This refers to software that renders your templates ahead of time and saving the output as HTML and CSS (and, potentially, JavaScript) static sites.
SSR is "server side rendered". In our case, this is a specific type of static site generator. In our case, the SSR process will "previsit" each page in a hidden browser, wait for everything to finish loading and templates to finish rendering, then save a snapshot of the result. That way the page has no "flicker", and is quick to load. We'll learn more about this process in Part 3, in addition to how the JS and CSS bundle automatically.
JAM Stack or Jamstack (JavaScript And Markup Stack) are nicknames for an approach (stack) for building websites that prioritizes JavaScript and Markup being delivered by static servers, with (optional) backing in the form of serverless fucntions or custom API app servers. Though the nickname only caught on in the last few years, the general approach is much older, and is praised for how much it simplifies managing both the design and content of content-heavy websites, while still allowing full interactive capabilities via JavaScript. Modulo is a great little framework for this sort of setup, and this section of the tutorial will walk through why.
CMS is a "content management system". It allows users to contribute changes to the site without having to code. For example, Wordpress is a popular CMS. We'll be using Decap as a CMS, since it "plays well" with this Jamstack approach.
SSG / Jamstack
Getting started
Modulo has two different ways to start a new Jamstack project: Either a 1) zip
file that you download and then put into a directory you then use a web server
to serve, or 2) by using the npm command in the terminal that comes with the
Node.js JavaScript runtime.
Follow the instructions below and get practice getting a new website project started:
Try it now
Start a new Jamstack project in one of 2 ways:
.zip- Go to /Examples/#StartingTemplate and download the Jamstack (Static Site with Markdown and CMS) zip file template- NPM: - If you have NPM installed, and are comfortable using it, use the
create-moduloscript by running the following command (no prior install necessary):npm init modulo
Click aroud, explore the features!
Read the section below for a "tour" of the directory structure. Try editing each thing and see if you can cause the effects you intend. Relevant files to edit:
- You will mostly work in the
src/directory - Edit the Markdown files in
src/articles/to add article or blog-style content (also editable by CMS, see below) - Edit the files in
src/static/to work on the CSS, JS, and HTML Templates that create Modulo Components (including the "x-Page" layout template) - Edit the files in
src/static/data/links/to change the ordering or content of the page navigation or article link list (also editable by CMS, see below)
- You will mostly work in the
Using local server and CMS (npm users only)
- NPM Users Only: If you using Simple Web Server and do not have NPM, skip this step!
- Try each of the following commands from your new repo:
npm start- Starts a simple HTTP server for convient testing: http://127.0.0.1:3334/
npm run startcms- Runs proxy for Decap CMS: http://127.0.0.1:3334/static/admin/
- This is intended for local content editing (it is NOT a live, public site)
- Note: Run this at the same time as
npm start(e.g. in another terminal)
npm run build- Generates static site build locally in
build/directory - Useful for testing server-side rendering
- Note: This requires dependencies. It runs
npm install moduloclifirst.
- Generates static site build locally in
Markdown
What is Markdown? - Markdown is a handy language for authoring large documents in a langauge that is close to HTML, but easier to write. In other words, if you are tired of typing
<p>over and over, maybe writing in Markdown is for you! Markdown converts to HTML, and is intended to save content authors effort and frustration with typing lots of HTML. Learn more at Markdown Guide and MarkdownTutorial.com
Markdown is one of the most popular tools to integrate into a static site generator. The Jamstack template we just installed has a Markdown system setup and ready to go.
Markdow-HTML
It's time for the Modulo Jamstack magician to reveal a trick! 🎩✨
The Modulo Jamstack template uses something that could be thought of as a sort of magic trick, a file that is "magically" both an HTML file and Markdown file. It's a sort of miniature "dual file format" that is as portable as HTML and as easy-to-edit as Markdown, by being both simultaneously. Let's dig into how it works.
The format is straightforward: The top of the file imports Modulo and opens a tag at the top to start the page and start interpretting the rest of the file as Markdown. Browsers auto-close any unclosed tags, so the closing tags are not necessary.
This becomes a file which is simultaneously both a stand-alone HTML page and,
when the "frontmatter delimiter" is configured correctly, a valid Markdown
document that can be read by a Markdown editor. It functions as an easy-to-use
HTML file, since these Markdown-HTML files can be "double clicked on" and
opened with the browser's file:// protocol, just like any other HTML file
saved with the "SAVE" feature on this site.
When opened in the browser, the user sees only the final rendered page (not the markdown source), complete with the markdown code converted into HTML, and any templating, CSS, custom code, etc applied. When opened with a text editor, these files resemble Markdown files, as long as you ignore the first line. This means that true novice coders, who are only comfortable using text editors but not comfortable with HTML or CSS, can edit these files as long as they don't touch the first line.
Furthermore, graphical Markdown editors (notably Decap), can be configured to accept a custom "frontmatter" deliminator. That means if you configure them to accept that long HTML string as the frontmatter deliminator, it will hide it from the user and editing the file will be like any other markdown file. This allows for properly configured GUI Markdown editors to open up and transparently edit these Markdown-HTML files as well, while enforcing that the "magic" words at the top that make it an HTML file as well remain.
Try It Now
- Open up
src/articles/example-article.htmlin your text editor (and browser as well, for comparison). Try making changes to the Markdown, to confirm it works. - For convenience, the relevant bits are also excerpted the beginning below. It is displayed "word-wrapping" so you can see the first line in it's entirity. As long as you don't edit the first line, the file will act like HTML but be editable like Markdown!
The first line:
The rest of the file:
- Bonus Challenge: To see how Decap was configured to accept this custom
frontmatter, examine
/static/admin/config.yml
Directories and Libraries
We've got one more topic for Part 2 of the Building Apps tutorial: How to keep your project manageable with so many components that might have the same name, or third party components you want to integrate into your project.
Directory structure
Learning Tip
- If you want a deep dive into recommended directory structures, keep on reading. Otherwise, skip over to the Library section below.
Refactor #1: Inititial structure
Described in the previous section (Building Apps: Part 1)
- For Component definitions:
/static/index.htmlfor the Component "header" file (e.g., just top level definitions)
- For Component Parts (CParts):
- Name all CParts based on a reasonable extension, e.g. for
MyComponentName: /static/components/MyComponentName.html(for Template)/static/components/MyComponentName.css(for Style)/static/components/MyComponentName.js(for Script)/static/components/MyComponentName.json(for StaticData)
- Name all CParts based on a reasonable extension, e.g. for
Refactor #2: Grouped each component
Used with the Jamstack / SSG template (here in Part 2)
- A possible solution would be to add further layers of directories, such as one to group each component
- e.g.
/components/Page/Page.html/components/Page/Page.css,/components/MainForm/MainForm.html, and/components/MainForm/MainForm.js, etc
Refactor #3: Grouping into libraries
Used on the ModuloJS website itself.
- Splitting components:
- If you have dozens of components, you might want to start grouping them together into "libraries".
- In this case you might have files like:
/components/layout/Page/Page.html,/components/layout/Page/Page.css,/components/forms/MainForm/MainForm.html, and/components/forms/MainForm/MainForm.js, etc
- Splitting "header" file as well:
- If your
index.htmlis getting too big, you can start spliting it into libraries as well, and importing them with<Modulo -src=...>style imports within your top-level/index.html(or,<Library -src=...>, covered next). - In the previous example you might have a file at the top level like
/components/index.html, which in turn brings in/components/layout/index.html,/components/forms/index.html, etc
- If your
Using the Library
In the previous section, we learned we can use -src= to split Template and
Style Component Parts into separate HTML and CSS files respectively. However,
what if our component definition files themselves get too big to manage? That
is, what if we define so many components, that we need to start organizing the
components themselves?
This is where the Library definition tag becomes useful. It allows us to cluster our components into individual Component Libraries, that then get imported into different Component namespaces.
First, re-examine our original Modulo import:
To use a Library definition tag, we move the -src="/static/my-stuff.html"
and add a namespace to one or more <Library> tags in the Modulo script
tag. This ends up looking like the following:
Why use namespaces? Namespaces allow different component library files to have conflicting component names. This is especially useful when using third-party component libraries or while working in a big team: That way, if both you and another developer define a component with some common name (eg
name="Button"), there won't be a conflict as long as you load each into different namespaces.
Let's break this down:
-src="./static/my-stuff.html"The
-srcattribute specifies the source of the component library file. This file can be anywhere that is accessible to your web-browser or web-server. Ideally, it should be in the same place as your CSS and static media files, such as astatic/directory, or whatever the equivalent is for your set-up.The component library itself (
my-stuff.htmlin this example) should consist of an HTML file filled with<Component>definitions.namespace="mylib"The
namespaceattribute specifies the namespace prefix, which is combined with a dash and the component name in order to create the component's full name.Example: If
my-stuff.htmlhas a component defined like<Component name="MyThing">imported withnamespace="mylib", then the resulting full name would bemylib-MyThing, and we'd use the component like
<mylib-MyThing></mylib-MyThing>.Multiple libraries: As we add more and more component libraries to a project, we can simply add additional Library definition tags into the Modulo
static/index.htmlfile.
However, there is a downside to splitting up your files in general (and this
goes for the other uses of -src as well): Each new file you create will require
an additional request to load it. This means that each additional individual
file you include in a page will cause the page to take a little longer to
loader. So, if -src= causes it to load slower, how can we stay neat during
development, but still have a fast site? This is where "building" comes into
play, which is the first topic of the next tutorial.
Try it now
Examine the use of
<Library>in the downloaded template fileBonus: Split off components into different Library definitions
Bonus: Change the namespace of one or more of your components from the default
x
Part 2: Summary
In this tutorial, we started by learning how to "go big" with a Jamstack or SSG project template. We learned how to edit Markdown pages for an easier to maintain website. We learned how to keep our components in a component library and then load that library into different HTML files.
Keywords
SSG - Server-side Generated, pre-rendering HTML and CSS on the server
Jamstack - nickname for approach that prioritizes JavaScript and Markup being delivered by static servers
CMS - "content management systems" users to contribute changes to a website without having to code via a userfriendly GUI
markdown -- Mini "HTML-lite" language for websites
Library - Allows grouping of Components into library files that can be "siloed" under a certain component namespace or configuration.
namespace - The prefix that replaces the default "x" and goes before the name of a component to form the complete component name, e.g.
namespace="maps"joins with<Component name="India">to form a<maps-India>component.
Too Big?
You may have noticed that by splitting into more and more files, our site may get bigger, but it also gets slower!
- The question that remains: How do we go big, but also, go fast?
The answer? By pre-building everything such as by using the automated build system that is setup with the Jamstack template. Learn more about this topic in the next tutorial section: